Quick Tips: How to Photograph Dogs
by Josie on Jul.03, 2010, under Articles
How to photograph your dog: essential tips to create stunning canine portraits!
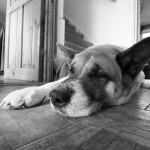 We all think our own dogs are the most beautiful creatures in the world, and I’m sure he/she is one of the most photographed subjects in your household!
If you’ve ended up with less-than-great results so far, take at look at my quick tips, and you’ll be a dog photography pro in no time!
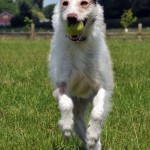 #1 Relax:
If you’re up-tight, your dog will pick up on it and become anxious too. The best thing you can do to get you and Fido in the mood for some photographic fun, is to have a play session before picking up your camera. This will burn off your pet’s excess energy and strengthen the bond between you before you begin.
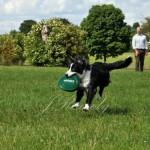 #2 Get help:
Photographing dogs is far easier if you have an assistant on hand to help distract them where necessary and keep them entertained while you take your shots.
 #3 Make some noise:
It’s different for every dog, but try making some odd noises until you get the reaction you want from them: high pitched dog whistles or bird calls tend to be the most successful at getting that quizzical ‘ears up, head cocked to one side’ expression.
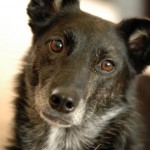 #4 All in the eyes:
Unless you’re going for an abstract shot of a paw / nose for example, make sure you focus on your dog’s eyes, particularly if you’re using a wide aperture, (small number, e.g. f2.8) which will mean there’s less of your shot in focus.
If you’re not careful, you’ll end up with lots of sharp shots of Fido’s nose and not a lot else.
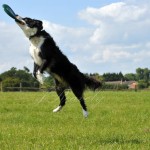 #5 Action!
Get outside and find a nice spot with an uncluttered background – your back garden if it’s big enough – or your local park is ideal. Get your willing assistant to throw a Frisbee or a ball, and practice keeping up with your dog as he or she leaps after it. It’s important to use a fast enough shutter speed to freeze the action.
The exact setting will depend on the lighting conditions, but it’ll need to be something in the region of 1/4000sec to freeze motion. You may need to boost your ISO to achieve the correct exposure.
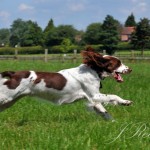 #6 Perfect panning:
This technique takes plenty of practice to master, but the results are worth the effort. If you want to suggest the speed at which your pet is moving in your image, then you’ll need a slower shutter speed – 1/250 or 1/500sec for example. Track your dog as he/she runs past you, gently squeezing the shutter release while continuing to pan after them, only stopping once the shot has been recorded.
Don’t be disheartened if you don’t get it right the first time: it takes practice to anticipate the speed at which your subject is moving in order to match it with the movement of your camera, keeping your subject sharp and your background blurred as a result.
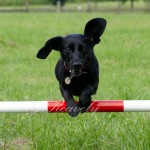 #7 Pre-focusing:
This is another technique that’s useful when photographing a dog in motion, so long as you can predict where it’s going to be. If, for example, you’re on an agility course with a jump, you can pre-focus on the point where you think the dog is going to clear it, and wait until just before they reach the top of the jump to press the shutter, catching your dog at the top of their arc.
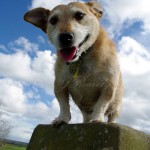 #8 Portraits:
Once your dog is suitably relaxed from all of your play-time, he or she will be more likely to sit still for a few posed portraits. Crouch down so you’re on your dog’s eye-level and use your whistle / assistant with a toy to attract your dog’s attention just as you press the shutter release.
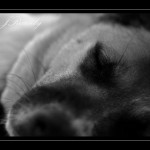 #9 Sleeping dogs:
The easiest time to bag a ‘cute’ shot is when your pet is asleep. This type of photography is well suited to experimenting with wider apertures than you’d use when the dog is awake, but be careful about picking the right focus point as your depth of field will be restricted.
Try focusing on your pet’s nose / paw and shooting with your lens ‘wide open’ (the widest aperture it will allow) to keep that small point in focus, while the rest will be beautifully blurred, complementing your pet’s dream-like state.
 #10 At home:
If you can, clear any clutter that’s not adding to your shot, but it can be good to include some of your dog’s toys or other personal items if it helps give some insight into their character. Lighting is important, so if you can, try to photograph your pet in a room where there’s plenty of natural light (such as by a patio window) or – if you’re feeling more adventurous (and your pet is used to it) you can try your hand at flash.
If using natural light, position your pet by your light source so their face is illuminated from the front and slightly off to the side for added depth – never shoot with your pet’s back to a window, or they will become silhouetted.